DLP 3D Printing : Why DLP is different from SLA 3D Printing
DLP or Digital Light Processing is a VAT Polymerization technology in which the Photo-Sensitive liquid resin is cured using a DMD projector which emits UV LED light to make a 3-dimensional object.

The VAT
Polymerization process consist of 2 main methods called the SLA or
Stereolithography and DLP (Digital Light Processing). We all have read in
detail how the SLA technology works and now we will learn about the DLP
technology and what is the difference between SLA and DLP technology.
The DLP is very much similar to the SLA technology. In
fact, the whole process is the same as the SLA but the difference lies in the light
source which cures the liquid polymer resin and the machine orientation of the DLP 3D printer i.e Bottom-Up curing method. In SLA UV Laser Beam
is used to cure the resin whereas in DLP technology DMD Projectors are used.
 |
| Image Source: MoonRay Desktop 3D Printer |
Digital Light Processing was developed by Larry Hornbeck of Texas Instruments in 1987. It is a set of chipsets that uses DMD (Digital Micro-mirror Device) technology which was based on optical micro-electro-mechanical technology. Digital Micro-mirror device contains thousands of micro-mirrors whose work is to navigate the light beam projected by the digital light projector. The quality of the DMD decides the accuracy and precision of the 3D Printer.
In
simple language, DLP 3D Printers uses conventional light source like an arc lamp
with a liquid crystal panel, which projects one image of the sliced product on the surface of the vat containing photopolymer resin. This process makes DLP
printer faster than SLA printer as in SLA point to point curing is done which
requires more time to print one layer whereas in DLP one complete layer is
projected at a time making it cure one slice at a time.
Companies like
EnvisionTEC, B9 Creations, FlashForge, Prusa, Peopoly are the
successful manufacturer for DLP 3D Printers. There are many Chinese, Korean, and
local companies who have started manufacturing cheap and DIY type DLP 3D Printers since last
decade.
Pre-Printing Process
Every
3D Printing process starts by developing the 3D model in the 3D design software
called the CAD (Computer Aided Design) file. This file is then converted into
.STL file also known as 3D Printer file.
This
STL file is then repaired using software like Materialise Magics or
Autodesk Netfabb is highly needed in VAT polymerization technique. For
example, in some cases the file is damaged or have empty shells than its
recommended to repair the file else that part will not get printed in the 3D
printer and there is 90% chance of printing failure.
Supports
are added to the STL file as per the requirement of the product. These supports are
mandatory as the object will need some ground support otherwise the part which
hangs will not get printed and due to that, the entire print will be failed.
The supported STL
file is then uploaded into the printer program where it is cut into slices as
per the micron we set. For example, if we set 50 microns in printing parameter
then the program will divide 1 mm hight into 20 slices, which means the
thickness of each slice will be 0.05 mm.
DLP 3D Printing Process
 |
| Diagram of DLP 3D Printing |
The
support and slicing of the 3D model is done in the 3D software so the model is
now ready to print. The complete STL file is uploaded in the printer software.
As I
have mentioned earlier that almost all the DLP 3D printers are Bottom-Up
technology so, as you can see in the image the machine consists of DLP
Projector placed below the resin tank and the built platform is above the resin
tank positioned upside down.
The
resin tank used in DLP are of much smaller size compared to SLA which allows
the operator to pour the resin as per the requirement. This is the best way to
save resin from getting exposed to the atmosphere and materials saving is
improved as the resin are expensive compared to FDM filaments.
The
upside-down metal platform travels downwards to the base of the platform with
the help of micro-motor and gets settled one layer above from the base of the
resin tank. The DLP projector projects one slice with the help of DMD chipsets
which contains millions of micro-mirrors whose work is to navigate the light and
create the image of the slice onto the surface of the resin tank from below.
 |
| Digital Light Processing (DLP) photo-credit: videoeffectsprod.com |
The
light is focused for some seconds (depends on the type of resin) and then the
light is covered. The built platform moves one layer upward and the resin tank
is makes a swing motion which results in peeling effect used to separate the
built layer from the base of the rein tank.
After
the peeling effect the next slice is focused and the whole process repeats
until the model gets printed. When the printing is done the platform moves
upwards and the extra resin gets drained by the gravitational force.
The bottom of the
resin tank is made of a transparent material called the Teflon or Siligel which
prevents the resin to get stick at the bottom during the curing process. The
peeling effect generates vacuum in the resin tank which damages the resin tank
in long duration and the operator needs to change the built plate.
Post Processing
 |
| Image Source: Think3d |
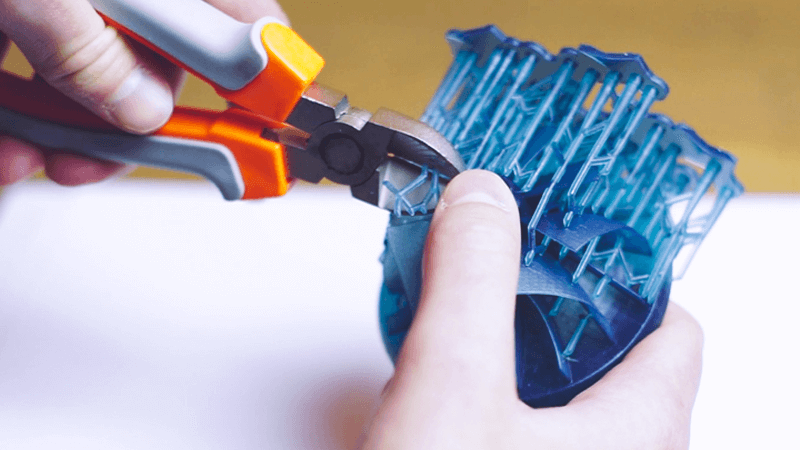
Once the entire printing process is completed and the product is built, the built part is then removed from the platform with sharp edge spatula as it got stick and hard due to the curing process. The part is still green (sticky) and can brake easily so we have to be care full while handling the part.
After
removing it from the plate the part is dipped into the alcohol for several
times to remove extra unwanted resin from the part surface. The part is then
dried completely with the help of air blower and then the supports are removed
with the help of a cutter. One should be careful while removing the supports as
in some parts where the thickness is minimum the parts get damaged.
Once
the supports are removed its placed inside UV oven for final curing. In UV oven
the part is put between the UV lights for 10 to 15 minutes depending upon the
resin and thickness of the part. Here the built part gets the highest possible
strength and becomes more brittle.
After taking out the part from oven, if needed extra process like sanding or brushing can be done to
remove the support marks from the surface of the part.
DLP Materials
The materials used in DLP 3D Printer are same as the SLA materials. But
there are some companies like EnvisionTEC and B9 Creations who customize their own
material according to the projector configurations. Among all various DLP 3D
printer manufacturers EnvisionTEC has the most number of different kind of
material which are used in different sectors like Mechanical, Defence and
Aircraft, Dental, Jewelry, Hearing Aid, and many more.

Difference Between SLA and DLP 3D Printing
We
have learned about both the technology and we also know how widely these technologies
are used in every industry. But still there are some points on which many industrialists
or engineers get confused as to which technology is useful for their
application.
The
points on which DLP differs from SLA technology is explained below:
 |
| Diagram showing working of DLP & SLA Technology |
We all
know that the primary difference between DLP and SLA 3D printing is the light
source used to cure the resin. The DLP technology uses projector screen while
the SLA technology uses the UV Laser Beam to cure the resin.
In SLA
technology point to point curing of resin is done which means the laser moves
on the resin surface tracing the geometry of the slice. So, the quality and
speed of the 3D printer depends on the thickness of the laser beam.
Where
as in DLP technology the light source or Projector remains stationary at fixed
position and project the entire image on the resin surface which makes DLP
printer faster than SLA technology. The quality of product depends on the resolution
of the projector and the distance from optical window.
 |
| Image Source: Formlabs |
In
terms of quality SLA technology gives more accurate and precise output than the
DLP technology because of point to point curing method in SLA. There are some DLP
3D printer manufacturers like EnvisionTEC, B9 Creations and Rapidshape
who have customized their own DLP projectors which gives excellent surface
finish and their dimensional accuracy is far better than regular DLP printers.
Parts
used in SLA 3D printer are expensive than the parts used in DLP 3D printer. For
example, the light source of SLA 3D printer is expensive and difficult to
replace once damaged. The intensity of UV laser cannot be controlled where as
the light source of DLP 3D printer is easy to replace and is less expensive.
The light intensity can be controlled according to the resin used.
The platform
size of SLA 3D printers is comparatively larger than the DLP 3D printers. Due
to this reason SLA 3D printers are mostly used where quality is required and
the product size is bigger or there is a need of mass production with accurate
dimensions.
DLP 3D printers are
mostly used in Jewelry Manufacturing, Dental Industry and Hearing Aid
manufacturing where the product dimensions do not exceed 170 mm in X, Y & Z
directions.


Comments
Post a Comment